For beginners, the question “Is it straightforward to buy canvas and paint it?” is one of the most common. Whether it is cotton or linen, untreated canvas surface fibers loosen, and oil in the oil paint can easily penetrate the fabric’s depths, resulting in the pigment layer drying, peeling, and even the whole piece of work yellowing and becoming brittle. Therefore, preparatory steps such as “Do I need to prime the canvas?”, “how dHow apply the gesso primer?” and “Should I sand the canvas first?” are not optional, but every painter must complete them before starting the painting. It is the basic homework that every painter must complete before they put pen to paper.
In this article, we will explain how to prepare canvas for oil painting, including canvas priming, painting techniques, sanding methods, and common misconceptions, to help you fully understand the process of creating a truly suitable canvas for oil painting.
Choosing the right oil painting canvas material
Before painting an oil painting, choosing the right type of canvas is the first step in ensuring the effectiveness and longevity of your oil painting. There are two main types of canvas on the market, cotton and linen, which you can choose according to your budget.
Cotton vs Linen: Which one is better for you?
Cotton canvas
Advantages: inexpensive, suitable for beginners;
Disadvantages: loose fibers, easy to deform, the tension decreases over time, and sagging and cracking of the picture may occur.
Suitable for: learning oil painting for novices, copying practice, student works, and other daily use.
Linen canvas
Advantages: tight fibers, high strength, good stability, and resistance to deformation by moisture; the picture is finer, making it suitable for thick paint or a realistic style.
Disadvantages: The price is high, and it is challenging to buy completely untreated, original canvas.
Applicable objects: professional painters, long-term preservation of creations, large-sized works, or portraits.
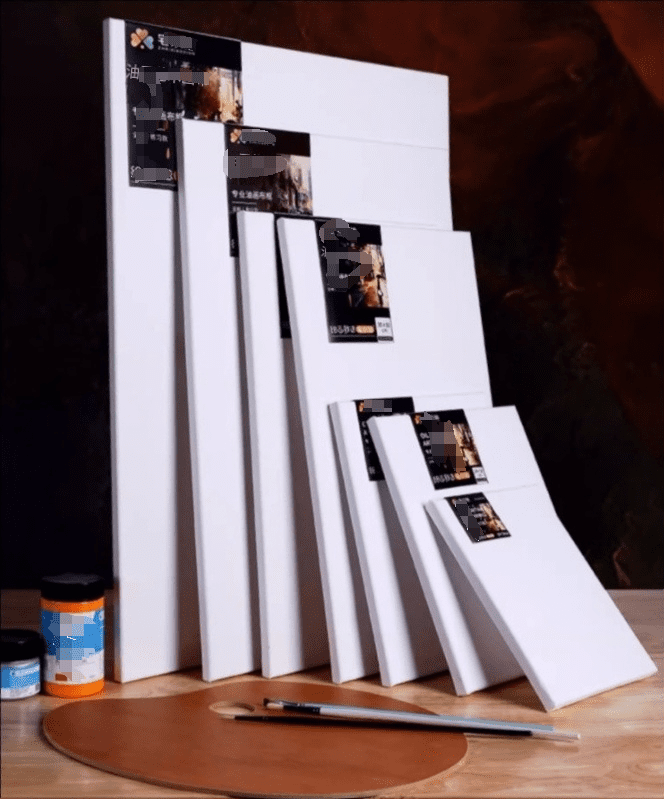
Pre-primed vs. self-treated: which is more suitable?
Many beginners often ask: “Do I need to treat the canvas I bought because it is already pre-primed with Gesso?” The answer depends on your creative needs:
Pre-primed canvas: suitable for direct coloring, but the base may be too smooth or too absorbent for complex techniques.
Raw canvas: more freedom to adjust the consistency or smoothness of the base according to your technique, making it more suitable for professional painting.
If you prefer a more personalized texture and stronger pigment adhesion, it is recommended to purchase untreated raw canvas and perform the oil painting priming treatment yourself.
Homemade canvas: free size, professional tension
For us, a flat canvas with stable tension is the foundation of painting quality. Compared to bought canvas, homemade canvas is not only more flexible in size, but also can be adjusted according to personal preference in terms of fabric tension and edge treatment.
Preparing Tools and Materials
Canvas fabrics: Cotton and linen are the standard options.
Stretcher bars: Purchase dry, non-deformed pine, cedar, and other suitable woods, and consider using a pre-made mortise and tenon structure for easy assembly and added stability.
Canvas pliers help to tighten the canvas evenly, avoiding slack or localized wrinkles.
Staple gun or large push pins: to secure the fabric to the back of the frame and to ensure that the front of the picture is clean and free of metal marks.
Scissors and ruler: for cutting and measuring.
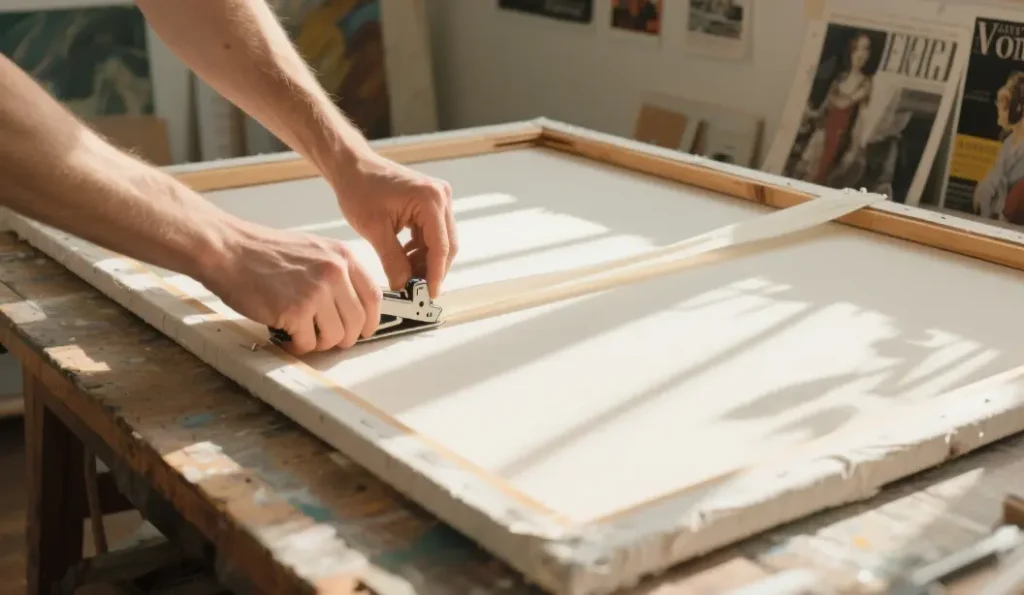
Detailed steps of canvas pulling.
- Cutting: Cut the canvas to a size larger than 5-8 cm on each side of the frame to make it easier to secure the edges.
- Assemble the frame according to the size of the picture needed. Make the right-sized wooden strips for the frame. Check whether it is a standard right angle; if there is any deviation, it can be adjusted using the frame square corner aids.
- Set the starting point: LPlace the canvas face down on the table and position the frame in the center. Starting from the center of the long side, fix the center of both sides first, then the center of the short side, and cross the four sides.
- Gradual tensioning: Use fabric pulling pliers to gradually tighten and staple the fabric from the center to the corners, with at least 5-6 staples on each side to ensure even tension.
- Tidying up the edges: fold the four corners of the fabric neatly and reinforce the back with pins to ensure that the front side is flat and not blistered.
- Check the tension: Tap the center of the screen with your knuckles. It should make a sound similar to that of a drum, indicating that the tension of the fabric is good.
Precautions and Tips
Don’t pull it too tightly at once; instead, fix it evenly and layer by layer to avoid unevenness on the cloth surface.
If you find the picture slack after pulling the cloth, you can insert wooden “tension wedges” at the corners of the back of the frame to fine-tune the tension.
Correct Priming Process: The First Protective Layer for Oil Painting
Whether it is a homemade studio canvas or a finished canvas, priming the canvas is a crucial step in oil painting that cannot be skipped. It not only improves paint adhesion but also prevents oils from penetrating the canvas, thereby prolonging the painting’s life.
Why must oil paintings be primed?
The dry oil in oil paint (such as linseed oil) will gradually penetrate the fibers of untreated canvas, leading to oxidation, brittleness, mildew, and even breakage. Priming creates a barrier film that protects the fabric and optimizes the saturation and fluidity of the colors in the picture.
Standard Priming Procedure
Sizing
Use rabbit skin glue or synthetic glue to seal the pores of the fabric and prevent oils from penetrating.
- Heat the sealer until it is in liquid form, then apply a thin layer while it is still hot, brushing it evenly in a horizontal direction.
- Allow to dry naturally for 12-24 hours.
Priming Coat (Gesso)
Apply two or three coats of Oil Primer or Acrylic Gesso.
- Alternate the direction of each coat (e.g., first coat horizontal, second coat vertical) to prevent a single texture.
- After each layer dries, apply the next layer to ensure a flat, crack-free surface.
- After drying, the smoothness can be adjusted with light sandpaper sanding (600 grit or above).

Tips
- If using linen, oil priming (Oil Primer) is recommended; for cotton, water-based priming (Acrylic Gesso) is preferred for faster drying and a non-odorant finish.
- Commercially pre-primed canvas saves time, but sometimes the base layer is too thin; it is still recommended to apply one or two additional coats to consolidate the finish.
Optional Steps: Make the Canvas Suitable for Your Painting Style
After priming, many painters add a few extra steps to improve the presentation and control of the image before painting. The following two methods, while not required, are highly beneficial to the overall painting experience.
Oil Out – for smoother brushstrokes
- “Oil Out refers to applying a thin layer of blended oil or medium to the surface of a dry base coat to increase lubricity and improve color absorption.
- The purpose of oiling is to enhance the fluidity of the pigment, allowing the brush to glide more easily, especially in thinly painted or realistic styles.
How to use: 1. Dip a clean brush into a small amount of blended oil (e.g., linseed oil + turpentine 1:1) and apply evenly to the picture. 2. Wipe the picture lightly with a clean cloth to remove excess oil and keep it“moist, but not oily.
Note: Avoid applying too much oil, as this can cause the subsequent pigment layer to wrinkle or be challenging to dry.
Toning – Setting the overall atmosphere for the picture.
On top of the white or yellowish base layer, some painters like to pre-paint a thin layer of tones, such as warm ochre or cool gray, to help establish the structure of light and dark and the overall atmosphere of the painting.
Role:
- Reduce the reflection of the white background so that the composition is more precise.
- Unify the color temperature of the picture, reducing the pressure of color mixing in the later stages.
- Facilitate visual focus, especially suitable for landscapes and portraits.
Recommended practice:
- Apply a thin layer of oil paint (+ diluted medium);
- spread evenly and wait for a few hours or the next day before painting.

What should I do after I finish priming?
After priming is completed, patiently waiting for the canvas to dry is a crucial step. Many beginners eagerly await the opportunity to start painting. Still, suppose the priming layer is not dry. In that case, it can easily lead to uneven oil absorption, cracking, and even peeling of the subsequent colors, which affects the quality and longevity of the entire work.
How long does it take for the priming layer to dry?
Generally speaking, the drying time of acrylic primer for underpainting (e.g., Gessosso) is relatively short, typically ranging from 30 minutes to 1 hour. However, to ensure the interior is dry, it is recommended to leave it for more than 24 hours before painting.
If a traditional oil-based base is used (e.g., White Lead Base), the drying time may be extended to several days or even more than a week.
How can I tell if it is dry?
- Hand touch test: lightly touch the picture with the back of your finger, no staining, no stickiness, the surface is dry;
- Observe the luster: if the picture still has uneven brightness or sticky areas, it means that it is not entirely dry..
- Nail scraping test: Gently scrape the edges of the nail. If it doesn’t leave any traces, it’s mostly dry.
How to arrange the canvas when drying?
- It is essential to keep the canvas clean, ventilated, and horizontal:
- Avoid direct sunlight and strong winds, and place it in a cool, well-ventilated area.;
- Place it either vertically or horizontally, but avoid placing it with the picture facing downwards or stacking it on top of each other.
- Avoid placing it in a damp, airtight storage room, as it will cause mold and mildew stains.
Frequently Asked Questions Gesso
How long does Gessosso take to dry for painting?
Although it appears to dry quickly on the surface, Gessosso takes at least 24 hours to dry completely. Especially in humid or cold environments, it is recommended to leave it for 24 hours before starting to paint. This ensures that the base layer is fully cured and that there will be no problems such as “primer peeling” or “brush sticking” during the coloring process.
Can I paint without priming?
This is not recommended. Unprimed canvas will easily absorb oil, allowing the pigment to seep into the fibers and result in oil spots, discoloration, and shedding of the pigment layer. More seriously, the canvas will become brittle over time, which will affect the longevity of the work.
Whether you are using linen or cotton, priming is a crucial step that should not be skipped.
Can I mix my primer?
Yes, you can. Many traditional oil painters create their own “traditional base” by mixing animal glue (e.g., rabbit skin glue) with Gessowderer (e.g., Gessosso or chalk). This method retains the classical texture, but is cumbersome and requires a high degree of proportion and order. For beginners, it is recommended to use CommercioGessosso directly, as this saves time and effort and provides a more stable and reliable product.