The most common way to seal an oil painting is to varnish it, using a clear varnish to form a protective layer over the picture to prevent dust, moisture, and UV damage. Depending on how dry the oil painting is, you can choose either temporary varnish (Retouch varnish) or permanent varnish (Picture varnish). Proper use of spray or brush application tools and selecting the correct type of varnish can effectively prolong the life of your work and unify the picture’s sheen. This article will show you step-by-step how to safely and professionally complete oil painting sealing.
Timing of oil painting sealing: surface dry vs fully cured
The core principle of sealing is to choose either “surface drying” or “full curing” depending on “temporary/permanent” needs. Wrong timing (e.g., sealing before drying) can lead to cracking, mildew, or dark colors.
Retouch Varnish: Table drying is sufficient, leaving room for modification.
Picture “touch dry”- no stickiness when touched by fingers (usually 1-4 weeks, faster for thinly coated works).
Function: Temporarily enhances the luster of the image, allowing the color to come closer to the “dry” effect, and allowing the artist to check if adjustments are needed (e.g., touch-ups, modifications to details).
Characteristics: Reversible (can be removed with mineral turpentine), does not interrupt the deep drying process and can be treated again after a few weeks.
Scenarios: student works, temporary presentations, unfinished creations (with the intention of subsequent modifications).
Picture Varnish: complete curing, long-term protection.
The base layer of pigment is fully cured – the interior is arid and there will be no traces when you scratch it with your fingernail (6 months to 2 years for traditional oil paintings, and 1-2 years for thick or slow-drying paints (such as Cadmium Red and Cobalt Blue)).
Function: Forms a long-term protective layer against dust, pollution and ultraviolet rays (some varnishes), making the work more durable.
Characteristics: Irreversible (or difficult to remove), suitable for finished works, collection-level exhibits.
Scenarios: Exhibition works, private collections, creations intended for long-term preservation.

Choosing the correct type of varnish
The varnish we choose when sealing an oil painting takes into account the purpose of the sealing, temporary or permanent, and the style of the work, flat or thick. Below is a comparison of the common types:
Temporary Varnish (Temporary/Re-workable Varnish)
- Characteristics: Fast drying (1-2 hours), reversible (removable), light gloss (doesn’t make the picture too bright).
- Recommended brands: Krylon Kamar Varnish (spray-type, easy to work with), Winsor & Newton Retouch Varnish (brush-type, suitable for detailing).
- Applicable scenes: student works, temporary display, unfinished creations.
Permanent Varnish (Permanent/Picture Varnish)
- Characteristics: Slow drying (24-48 hours), irreversible (or difficult to remove), glossy optional (matte / semi-matte / high-gloss), UV-resistant (some brands).
- Recommended brands: Gamvar Picture Varnish (breathable, suitable for thick paint jobs, does not hinder drying), Winsor & Newton Artists Varnish (high gloss, enhances texture).
- Suitable for: exhibition works, private collections, and long-term preservation of creations.
Suggestions for selection:
- If the work is to be modified frequently, choose a temporary varnish.
- If the work is finished and intended to be kept in a collection, choose a permanent varnish.
- If the picture has a thickly painted texture, choose a spray varnish (no brush marks);
- If the picture is flat, choose a brush varnish (more even).
Oil painting, sealing materials, and tools preparation
The following materials and tools should be prepared before sealing to ensure smooth operation:
- Varnish: according to the requirements (temporary/permanent, spray/brush).
2. Tools:
- Spray varnish: no additional tools needed (cans come with spray nozzles);
- Brush varnish: special varnish brushes (wide, flat, soft-bristled brushes, e.g., 2-3-inch flat-tipped brushes) — avoid regular oil brushes (stiff bristles that leave brush marks);
- Oiling out tools include soft cloths (e.g., microfiber cloths) and linseed oils (or oiling mediums), which are used to unify the luster of the picture (see “Optical Layer Unification Technique” below for details).
- Oiling Out: Solving Uneven Lustre Problems
- In case of “matte spots” (certain areas with insufficient gloss) due to a thick coating or the use of too little medium, the “oiling out” should be adjusted before sealing:
- Dilute linseed oil and turpentine 1:3 (or use oiling out medium directly);
- Dab a small amount of the dilution on a soft cloth and gently wipe it off with the oiling out medium. Dip a soft cloth in a small amount of the diluted solution and gently wipe the “oiling out” areas to restore the color.
- Wait 24 hours for the oil to penetrate completely before sealing.
Oil painting sealing operation steps in detail.
The core of sealing is “thin, even, avoid re-coating.” The following are the specific steps of spraying and brushing:
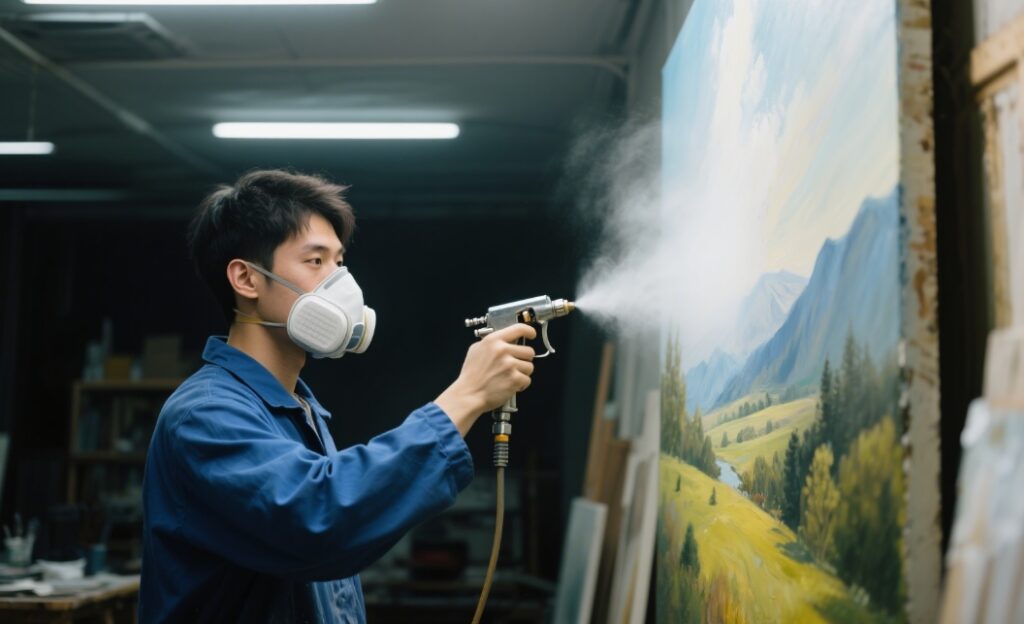
Spray Sealing (suitable for thickly painted, obvious texture works)
Prerequisites: the picture is touch dry (not sticky), the environment is ventilated and dust-free (e.g., balcony or studio with a dust cloth to enclose the space).
Detailed steps:
- Shake the spray can (at least 30 seconds) to make sure the varnish is even.
- about 40cm (16 inches) away from the picture, spray 1-2 layers horizontally → vertically → diagonally (each layer is thinly applied to avoid hang-ups);
- 1 minute interval between each layer (to allow the varnish to dry);
- to check the evenness (if there are any omissions, make up for them when it dries);
- to wait for 1 hour (basically dry), and then cover it with a dust cover (to avoid dust).
Brush sealing (for flat and detailed works)
Prerequisites: complete curing of the picture (or use breathable permanent varnish), constant temperature (18-25°C) and humidity (40-60%).
Detailed steps:
- Pour the varnish into a shallow dish (avoid pouring directly from the bottle to prevent contamination).
- Dip a special varnish brush into a small amount of varnish (the bristles only need to be dipped by 1/3);
- Brush in a cross-direction (e.g., left → right, then up → down), keeping the “wet edge” (i.e., the brushed area is still wet, to avoid faults);
- Apply a thin layer, do not repeat the brushing (re-brushing can blot out the undried varnish); Finish Thinly apply a layer, don’t repeat the brushing (re-brushing will make the undried varnish bloom);
- After finishing, put the work in a ventilated and dust-free place and let it dry naturally for more than 24 hours (prolonged to 48 hours when the temperature is low).
Maintenance and renovation after sealing
Sealing is not “once and for all”; regular maintenance and renovation are needed to maintain the protective effect:
Daily cleaning:
- Use a soft-bristled brush (e.g., a loose powder brush for make-up brushes) to gently sweep away dust from the picture (including the edges of the frame);
- Avoid using a wet cloth (water will soften the varnish and cause it to peel off);
- Stay away from direct sunlight, air conditioning vents, and kitchen fumes (which will accelerate the aging of the varnish).
Reversible maintenance:
- Permanent varnish can be removed and re-varnished every 5-10 years (with mineral turpentine or special varnish remover);
- When removing, use a soft cloth dipped in the remover to gently wipe the old varnish layer (do not rub it hard to avoid destroying the pigment layer).
- Before re-varnishing, inspect the surface for any cracks, mildew, or other damage (if present, repair them first).
Storage environment:
- Temperature: 18-25℃ (avoid high temperature causing the varnish to hang and low temperature causing slow drying);
- Humidity: 40-60% (too high humidity will make the varnish absorb water and produce white mist; too low will make the varnish brittle);
- Ventilation: keep the air circulating (avoid humidity breeding mold).
Frequently Asked Questions: Solving Your Doubts
How many years do I have to wait for sealing?
Temporary sealing: surface dry (1-4 weeks); permanent sealing: wait for complete cure (6 months to 2 years, extended to 1-2 years for thicker coatings).
Will spraying leave brush marks?
No. Spray varnish covers the picture evenly with atomized particles, without brush marks, and is suitable for thick paintings or works with obvious texture. 3.
Will sealing affect the pigment color?
Temporary sealing: The original color can be restored (the color will remain unchanged after removal). Permanent sealing: Ensure the picture is fully cured (otherwise, the varnish will seal the pigment’s breathing, resulting in a dark color).
Can I frame after sealing?
Yes, but leave a 5mm space (between the frame and the picture) to avoid blocking the breathing of the varnish layer (resulting in mold or cracking).