When is an oil painting considered complete? From creation to drying, varnishing, framing, and final hanging and preservation, every step is crucial to the longevity and artistic value of the work. Sealing is not merely the end of the oil painting process; it is the beginning of protecting the creative expression. For the creator, whether a painting is “complete” does not depend on whether every step of the process has been completed, but rather on whether, when you look at it, you can no longer find any areas that need to be modified. Understanding and treating every detail with care is the proper cultivation and self-awareness required to complete an oil painting.

How can I tell if a painting is finished?
Unlike photography or digital art, there is no “autosave” or “percentage of completion” for oil paintings. Whether or not a painting is truly finished depends on the creator’s satisfaction with the work and the integrity of the expression. Here are a few ways to determine if you are ready to finish:
Are you still able to paint?
When you hesitate in front of the canvas, unsure of where to make further changes, or when any additional movement could compromise the current structure and atmosphere, it may be time to “call it quits.” Many artists say, “If you are afraid to move your brush, it means you have finished.
Does the image effectively convey the theme you want to express?
Has it told the emotion, the atmosphere of light and shadow, or the story you want to convey? The purpose of art is not only to express technique, but also to convey emotion. If you can stand in front of the painting and say, “It expresses what I wanted to express in the first place.” Then the piece has accomplished its mission.
Are the composition, colors, and brushstrokes in balance?
From the balance of composition, color harmony, contrast of light and dark, to the overall rhythm and restraint of the brushstrokes, if you already feel that the picture is in harmony, and that there are no “glitches” or “bruises” that you want to correct, then it may be a sign of completion.
Emotional judgment: “I like it the way it is now.”
Sometimes, there’s no need for logic, as long as you look at it and think, “It’s complete, it’s the way it should be.” That’s its final state. Creating art is not a technical punch line, but a unification of emotion and judgment.
It is also a kind of wisdom to keep one’s breath.
Experienced painters know that “painting too full” is a common mistake made by amateurs. Leave some white space for the picture, and allow some room for yourself; this creates more tension. Stopping at the right time is the sign of a mature painter.
Final touches and drying preparation
After you think the picture is finished and there are no changes to be made, the next step is to allow the oil painting to dry safely. However, oil paintings do not dry as quickly as watercolors or acrylics, which have a two-stage drying process: surface drying and complete curing.
How long does it usually take for an oil painting to dry?
Surface drying: Typically 5 to 14 days, depending on the paint thickness and medium used. At this stage, the picture is not sticky to the touch, but the interior is not yet cured.
Completely dry (cured): It takes 3~6 months, some thick paintings even up to one year.
How to judge whether it is “surface dry”?
Back of hand test: gently touch the screen with the back of your hand (avoid using your fingertips, as this may accidentally leave fingerprints). If the screen does not stick to your hand and leaves no mark, it means that it has entered the dry state.
Toothpick test method (for thick coating areas): Gently poke the thick coating area with a toothpick. If it is slightly deformed but shows no adhesion of pigment, it also indicates basic stability.
Correct drying method
Oil paintings should not be artificially heated or blown, as this can damage the picture. The simplest and most effective drying method is:
Place the oil painting upright on the wall of the studio or an easel, and keep the room well-ventilated; alternative fast-drying methods are also available.
Do I need to varnish or seal my painting after it has dried?
Once your painting is finished and has dried thoroughly for several months, many creators consider the need to “varnish” or “seal” the painting to protect it. This step, although not strictly necessary, is crucial in the professional creation of a painting and can significantly enhance its visual effect and longevity.
Why do I need to varnish my painting?
Unify the luster of the picture: In the process of creation, due to the different oil absorption of other pigments and media, the picture is prone to “gray” and “partial matte” after drying. After varnishing, the entire surface of the painting will have the same luster, which makes the painting appear more transparent and the colors more vibrant.
Enhance the protective layer: oil painting varnish can form a protective film on the surface of the picture, preventing dust, moisture, air pollution, and minor scratches from directly harming the pigment layer.
Convenient for post-cleaning: Using removable varnish (such as Damar varnish), if the picture needs to be restored or cleaned in the future, the varnish can be removed simply without damaging the original pigment underneath.

What types of varnish are available?
Retouch Varnish:
- Short drying time, suitable for “temporary protection” of the picture;
- Can be used during the surface drying stage.
- Ideal for quickly treating grayed areas before exhibitions.
- The disadvantage is that the protection is weak and not durable enough.
Final Varnish:
- Must be applied when the painting is arid (after 3-6 months);
- provides proper long-term protection;
- available in gloss, matte, and semi-gloss.
Spray vs Brush:
- Spray varnish is easy to handle and suitable for beginners.;
- The brush type offers more delicate control and is ideal for experienced users.
How to polish and seal correctly?
Preparation:
- Make sure the screen is free of dust.
- Find a well-ventilated place to work;
- Use a special varnish brush or spray, holding it about 30cm away from the screen, and apply a thin coat at a time.
Handling tips:
- When spraying, it is recommended to “cross twice”: first horizontally, then vertically to maintain a light and even spray.
- Brush in the direction of the picture strokes, one stroke, not back and forth;
- After varnishing, let it dry for at least 2-3 days before sealing the frame or mounting.
What else do I need to do after varnishing?
- Label the work appropriately: write down the time of varnishing and the materials used on the back of the frame;
- Use a dust cover or frame for mounting tto avoid air pollution further
- Avoid direct sunlight and high humidity when storing the work, as even though it has been varnished, improper storage for an extended period can affect its condition.
Is it possible to remove varnish from oil paintings?
- Yes, provided you have used a “removable” professional varnish (e.g., Damar varnish). Removal methods are as follows:
- Use the appropriate varnish solvent (e.g, turpentine for Damar varnish);
- Apply a small amount with a soft cloth and gently wipe the painting.
- This is not recommended for frequent use and should only be used in professional restoration or refurbishment scenarios.

Edging and Signing: Final Details After Completing the Painting
Once an oil painting is finished, dried, and sealed, many people think the job is done. However, there are two crucial “final steps” that should not be overlooked: edging and signing. These not only make the painting neater and the work more complete, but also facilitate subsequent exhibitions and collections.
Why trim the edges after sealing?
During the oil painting process, especially when applying color near the edges or using thick layers of paint, pigment can easily bleed onto the sides of the canvas or the edges of the frame. If left untreated, these “bleed marks” can make the work appear less clean and professional.
Use a clean knife or palette knife to gently scrape off excess paint from the edges (be careful not to scrape the painting itself);
Use a clean cotton swab dipped in a small amount of odorless solvent to wipe away paint residue from the frame edges and canvas sides.
If the edge colors are incomplete, gently touch up with the same paint to maintain consistent edge tones.
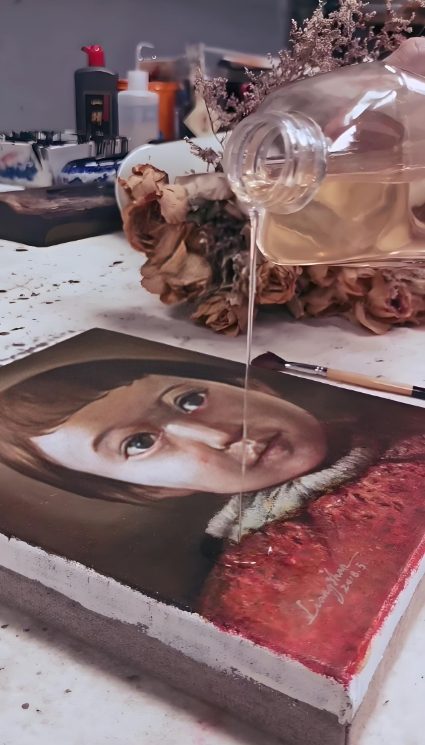
Where should the signature be placed, and what tools are recommended for use?
Signing an oil painting is not simply “signing your name”; it is the artist’s final “seal” on the work. A sound signature can serve to identify the artist, enhance professionalism, and increase the work’s recognizability.
Common signature locations:
- The bottom right corner is the most common and recommended location.
- Alternatively, based on the composition of the painting, the bottom left corner or side can be chosen.
- The key principle is to avoid overshadowing the main subject of the painting or disrupting visual balance.
Recommended tools for signing:
- Acrylic markers: stable color, easy to control, and quick-drying;
- Fine brushes + oil paints in the same color family: suitable for signatures that blend well with the painting;
- Avoid using markers or water-based pens that may cause the oil painting. to fade or stain
Pre-hanging preparation steps
Does an oil painting require a frame?
Although oil paintings already possess strong expressive power, selecting an appropriate frame not only enhances the overall artistic quality of the work but also plays an essential protective role in practical use.
Selecting frames based on style to complement the artwork’s character: Classical oil paintings with traditional themes such as portraits or landscapes typically pair well with ornate metal-colored or dark wooden classical frames to create a solemn and weighty atmosphere; modern abstract or minimalist-style oil paintings can opt for frames with clean lines, light wooden tones, or black-and-white hues to emphasize the artwork’s inherent tension and contemporary aesthetic.
Enhance protection and extend lifespan: Picture frames provide physical edge protection for oil paintings, effectively preventing wear and deformation of the canvas edges during transportation or exhibitions. They also help maintain the flatness of the artwork when hung, preventing sagging or loosening of the frame.
Avoid glass coverage: Most oil paintings are not recommended for display under glass. On the one hand, the surface of oil paintings has a particularly three-dimensional texture and reflective properties, and glass may weaken this visual effect. On the other hand, glass may cause humidity buildup due to sealing, which is unfavorable for the drying and “breathing” of the oil layer, potentially leading to mold growth or yellowing over time.
Notable environment exceptions: If an oil painting needs to be displayed long-term in high-humidity, high-pollution spaces (such as stations, restaurants, public corridors, etc.), professional anti-reflective acrylic panels or museum-grade glass can be selected, combined with ventilated backing boards, for careful protection.
How to prevent mold and deformation when hanging paintings?
To prevent mold growth or deformation during hanging, the following simple and effective methods can be adopted:
1. Ensure ventilation behind the painting
Leave a 1–2 cm gap between the painting and the wall to prevent moisture accumulation. Attach small rubber pads or cork pieces to the four corners of the frame’s back to enhance airflow.
2. Use professional hooks
Select D-ring hooks with hanging wires or L-shaped hooks to distribute the weight evenly and prevent deformation, using thin ropes or nails that directly penetrate the frame.
3. Avoid humid or high-temperature locations
Do not hang oil paintings in kitchens, bathrooms, near radiators, or in direct sunlight, as these environments can cause deformation, fading, or mold growth.
Long-term Care and Maintenance
What details should be noted for daily care?
After an oil painting is completed and sealed, the daily environment and cleaning directly affect its lifespan. The following are some basic but essential care principles:
- Avoid direct sunlight: Strong ultraviolet rays can cause the paint to fade and the oil layer to yellow. Avoid hanging oil paintings near windows or in direct sunlight.
- Keep away from kitchens and humid environments: Kitchen fumes, steam, and fluctuations in temperature and humidity can damage the stability of the painting. Do not hang oil paintings in kitchens, bathrooms, or similar areas.
- Ensure proper air circulation: It is recommended to leave a 3–5 cm gap between the painting and the wall to prevent mold growth.
- Regularly clean dust: Use a soft, dry brush (such as a makeup brush or a velvet brush) to gently remove surface dust once a month, preventing dirt buildup.
How often should varnish be reapplied?
Varnish is not a permanent solution; it also ages over time. Under normal circumstances:
- It is recommended to reapply varnish every 5–10 years, depending on environmental conditions and the condition of the painting.
- Watch for signs: When you notice the painting gradually yellowing, dimming, or losing its original luster, it is time to reapply varnish.
Frequently Asked Questions (FAQ) Logical Guidance
How long does it take to complete an oil painting?
This depends on the complexity of the painting, the materials used, and the rate at which it dries. From sketching and applying color to layering, and finally, drying and varnishing, this process can take anywhere from a few weeks to several months. Especially for thickly painted works or wet-on-wet techniques, drying times will be longer. Completing an oil painting is not just about finishing the painting itself, but waiting for the entire composition to stabilize and ensuring each step of the sealing and protection process is handled correctly before it can truly be considered “complete.”
How long after varnishing can the painting be framed?
Generally, after the varnish has completely dried, wait 2–3 days before framing the painting. This allows the varnish to harden fully, preventing damage to the varnish layer from contact or pressure during the framing process. It is recommended to keep the painting upright in a well-ventilated area during this period, allowing it to dry naturally without the use of additional heating or artificial acceleration.
Can an oil painting be repaired after it has been sealed?
Suppose a reversible varnish (such as dammar varnish or removable resin varnish) is used. In that case, it is possible to remove the varnish layer locally in the future and perform small-scale repairs. After the repair is completed, the painting can be re-varnished. However, the repair process requires high technical expertise, so it is recommended to entrust it to professional painting restoration specialists to avoid damaging the original pigment layer due to improper handling.